Dynamo - Etab Excel to Revit
Parachence - Etab Excel to Revit
Video example of how to use Etabs to Excel
Dropbox dyn file
https://dl.dropboxusercontent.com/u/35803291/dyn/MYETABSDYNAMO.dyn
This Dynamo node “Etabs Excel to Revit” from package "Parachence" maps an Exported Excel file from Etabs to a new formatted Excel file. The new formatted Excel file is translated in Dynamo to generate points and curve lines which a user can use to generate Revit model elements or update elements. The following steps will help a user get started.
Step 1: Export from Etabs. Use the : Model Explorer - Tables - Add New Table Set

Step 2: Select the following tables to export: Joint Coordinates, Beam Connectivity, Column Connectivity, Framing Section and Frame Assignments - Section.

Step 3: In Dynamo download the package Parachence and select the node "Etabs Excel to Revit”. The package uses “Bumblebee” to access the Excel file as a read only which is more stable than the Dynamo node.

Step 4: The first time you click on the “Etabs Excel to Revit” it may not load the c# program. Close Dynamo and start it up again. When the “Etabs Excel to Revit” is clicked it should load the “.dll” package temporarily during the Dynamo session. If it’s successful you should see the temporary “Etabs_ExcelToRevit” package.
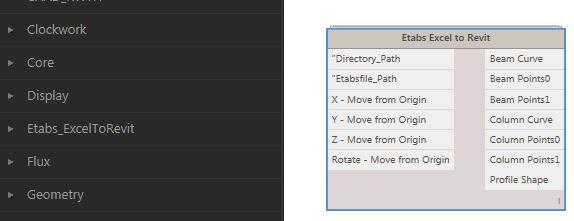
Step 5: They Dynamo node will need the location of your exported Etabs file. Directory in which you wish to save your new formated Excel file. If your Revit model and Etabs model don't align adjust by adding an XYZ and Rotation.

Step 6: Hit the “Run” command if you’re not set "Automatic”. The values returned will be the start and end points for columns and beams along with curves and section.


Hello, are you able to share you VBA / Dynamo please? It would greatly assist in trying to understand the Etabs API. Thank you
ReplyDelete